1. WHAT ARE WE GOING TO MAKE
Okay, here's my first tutorial. We're going to make a dialogue system with expression.
To be clear, it's the finished work of this tutorial.
If you recognize those characters, maybe you had the same feeling of excitement when you have to replay the game again and again just to
Enough talking Riviera, let's just get started
2. CREATING THE UI
The original version of this tutorial is using NGUI. But not everybody can afford it, so I alter some part of the code so it could work on uGUI 4.6
I'm not going too in-depth in this part, as you can easily find uGUI tutorials in Google.
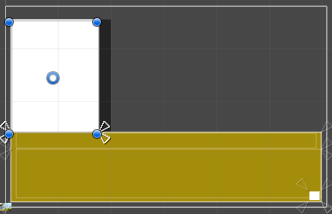
But I'll at least show you the Anchor points.
Start by creating the UI in this hierarchical order

I erased some objects so it won't confuse you if you start from an empty Scene.
- In the "Hierarchy" tab, click Create > UI > Image for Background, Portrait, and Notif
- and Create > UI > Text for Name and Text
- the DialogueTyper is just an empty object. Create > Empty Child. Set the anchor point to each corner of the Canvas, and set the Top/Left/Btm/Right to 0.
- Change the color you like, and don't forget to sort the hierarchical order to match the pic
- Set the Anchor point for each UI, so it won't be broken if the resolution changed. You can tweak this by yourself, but if you want to copy mine
 |
| Background |
 |
| Name |
 |
| Notif |
 |
| Portrait |
 | |
| Text |
No comments:
Post a Comment